As an Amazon Associate I earn from qualifying purchases.
In my last post, I showed you how to integrate slack notifications into your python trader (or any python application for that matter). Today, I will be showing you how to send an email from Python. This is useful if you want to know when your trading bot opens/closes trades. reaches the maximum draw-down etc.
Create a Gmail account
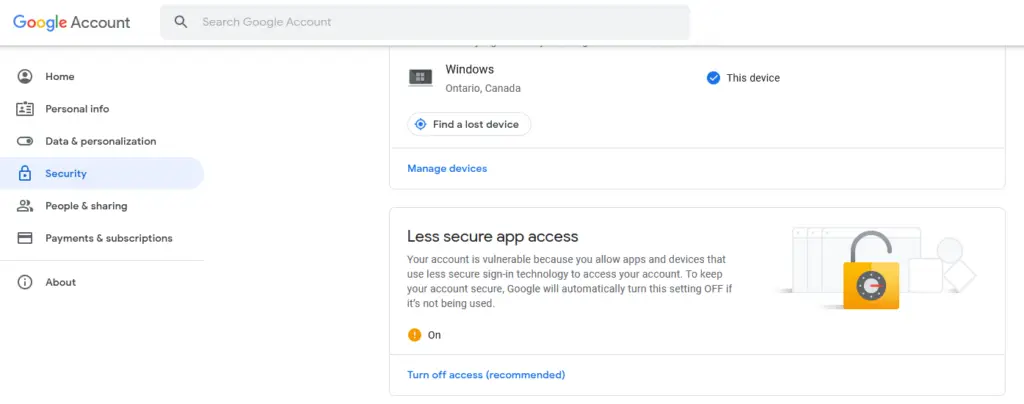
It is highly recommended that you create a new Gmail account for this as you will be turning off some security settings, to enable sending emails from python. Go ahead and setup a new Gmail account here. After this has been setup, navigate to the security tab on the left hand side. Scroll down to ‘Less secure app access’ and turn this on. This will allow python to send emails as this user.


That’s all for setting up your email address – let’s jump in to the Python code
Sending an email from Python
To send an email from Python, you need to start by importing the smtplib, MIMEMultipart and MIMEText. You will be using these libraries to send an email.
import smtplib
from email.mime.multipart import MIMEMultipart
from email.mime.text import MIMEText
Next, create a method and name it send_email. This will take 3 parameters: recipient, subject and body. Start by defining the SSL port (465); smtp_server which is “smtp.gmail.com” and your email address that you created above and password.
def send_email(recipient, subject, body):
    port = 465
    smtp_server = "smtp.gmail.com"
    sender_email = "youremail@gmail.com"
    password = "yourpassword"
Next, go ahead and assign a MIMEMultipart class to a variable named msg and define your From email and To email:
    msg = MIMEMultipart()
    msg['From'] = sender_email
    msg['To'] = recipient
Add your subject to the MIMEMultipart message, convert the body to MIMEText and attach this to the message:
    msg['Subject'] = subject
    body = MIMEText(body)
    msg.attach(body)
Finally, all we have to do now is open the connection to the email server and send the email. Start by creating a connection to the smtp server:
server = smtplib.SMTP_SSL(smtp_server, port)After this has done, login, send the email and close the server:
    server.login(sender_email, password)
    server.sendmail(sender_email, recipient, msg.as_string())
    server.quit()
Testing the code
Now that we have finished the implementation of our code, let’s test it. For this test, I will be calling the send_email method created earlier passing in a recipient, subject and body. I will be sending this to a yopmail email address. Yopmail is a service for generating disposable email addresses and is great for sending test emails.
After running the following:
> send_email("conor@yopmail.com", "My Test Email", "Hello from Python!")My email appears in the yopmail service:


If you’re interested in learning Python I highly recommend this book. In the first half of the book, you”ll learn basic programming concepts, such as variables, lists, classes, and loops, and practice writing clean code with exercises for each topic. In the second half, you”ll put your new knowledge into practice with three substantial projects: a Space Invaders-inspired arcade game, a set of data visualizations with Python”s handy libraries, and a simple web app you can deploy online. Get it here.
That’s all for now! Check back on Friday to see how you can implement position management for your trades in Python! As always, if you have any questions or comments please feel free to post them below. Additionally, if you run into any issues please let me know.


